

Hi, everybody! Welcome back!
Today , I show you some cards and embellishments that I made with the Magical Forest collection by Crate Paper.
Materiali utilizzati:
- https://www.ilnegoziodellamammadicle.com/prodotto/magical-forest-puffy-stickers-28-pkg/
- https://www.ilnegoziodellamammadicle.com/prodotto/magical-forest-ephemera-die-cuts-40-pkg-cardstock-w-copper-foil-accents/
- https://www.ilnegoziodellamammadicle.com/prodotto/magical-forest-chipboard-stickers-67-pkg-w-copper-glitter-accent/
- paper pad *Magical Forest* collection
- vellum *Magical Forest* collection
- clear set stamps *Magical Forest* collection
- White Bazzil
- Polishrink
- Page protector
- Fuse Tool by WeRmemory
- Embosser
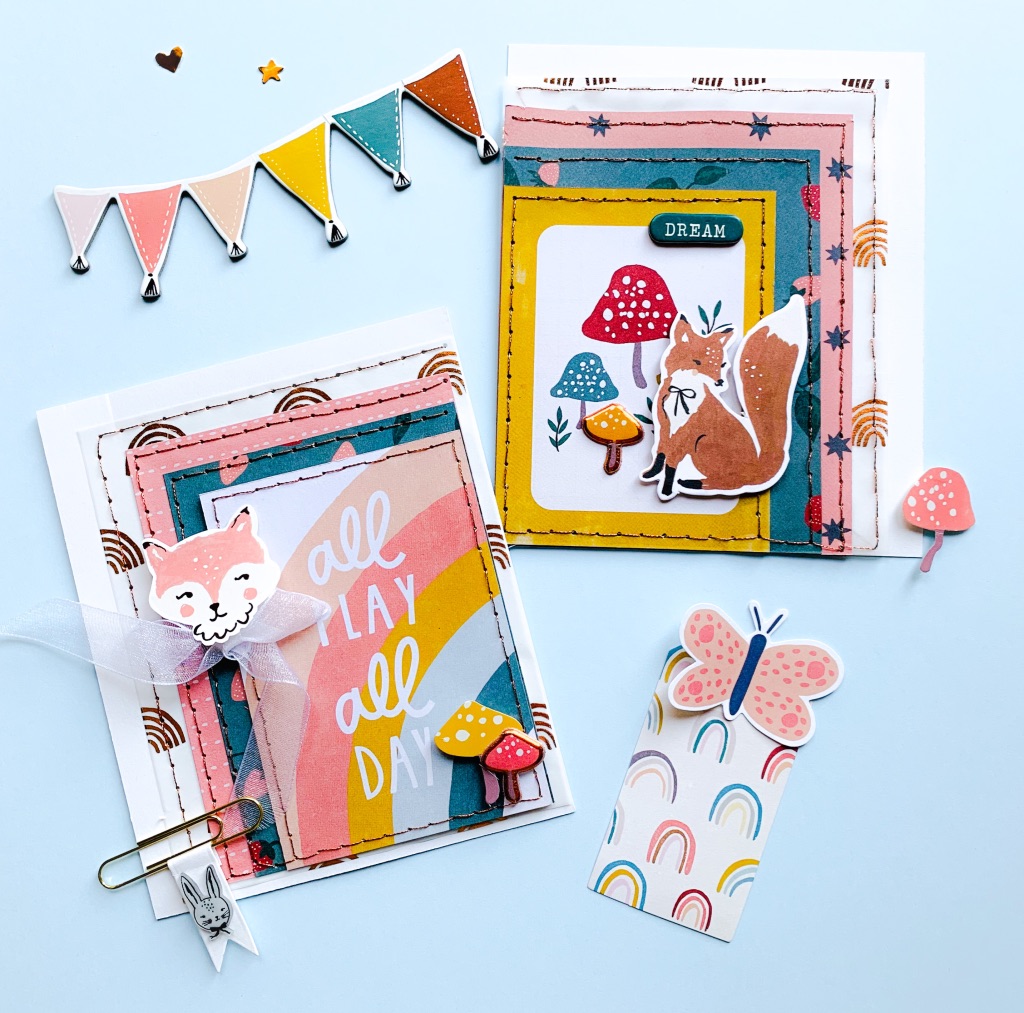
First, from the -willow saule-sauce sheet, I cut out the box with the mushrooms and, from the die-cuts , I took the card with the rainbow and the words: “All play all day”.
With the Book Binding Punch Guide, I sewed the outlines of the two badges.
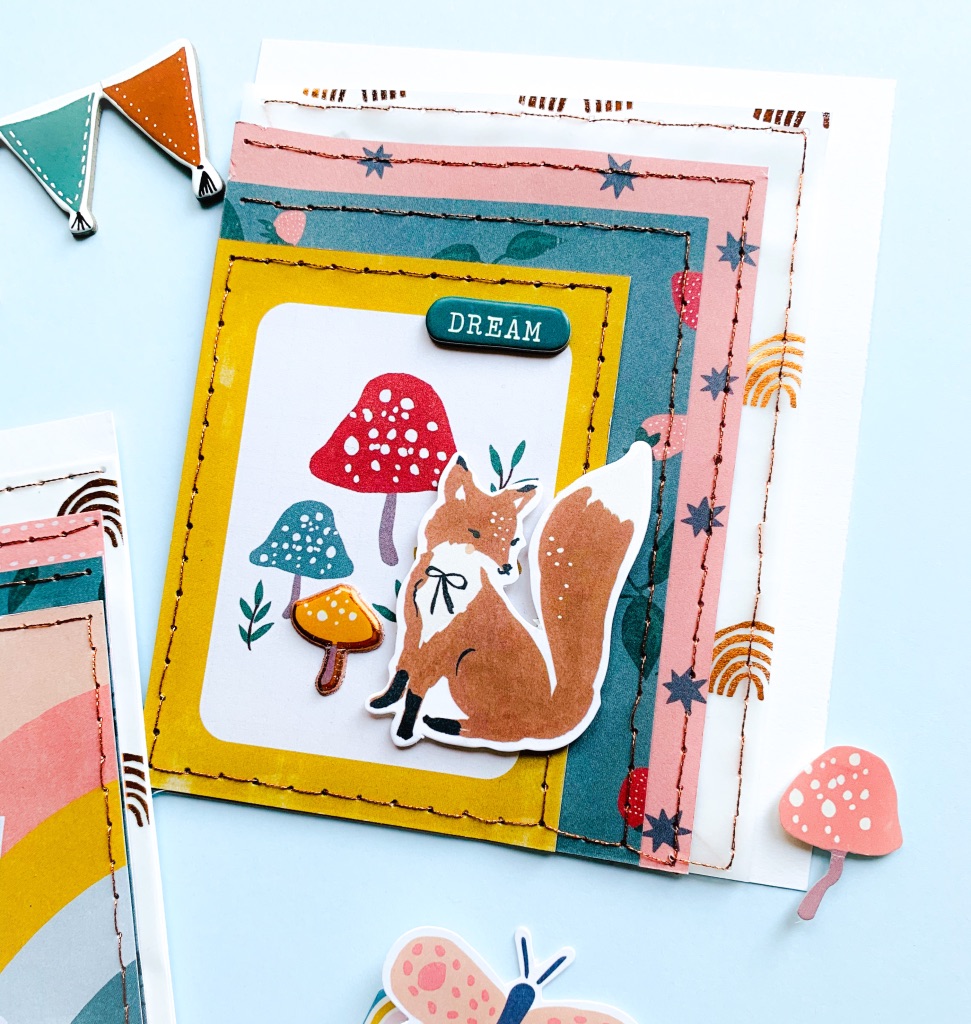
From the Garden Magical Forest sheet, I cut two 9cm pieces of width x 11.5cm and I placed them under the tiles.
I sewed the top side and one side only.
With the sheets Discover Magical and Wishes Magical , I created a second slaughtering, cutting at 10cm wide x 12.5cm high.
I sewed the top side and one side only.
Finally, with the Vellum dreamer Magical, I cut two 11.5cm pieces width x 14cm high; I sewed the top and only one side of the two outer sides.
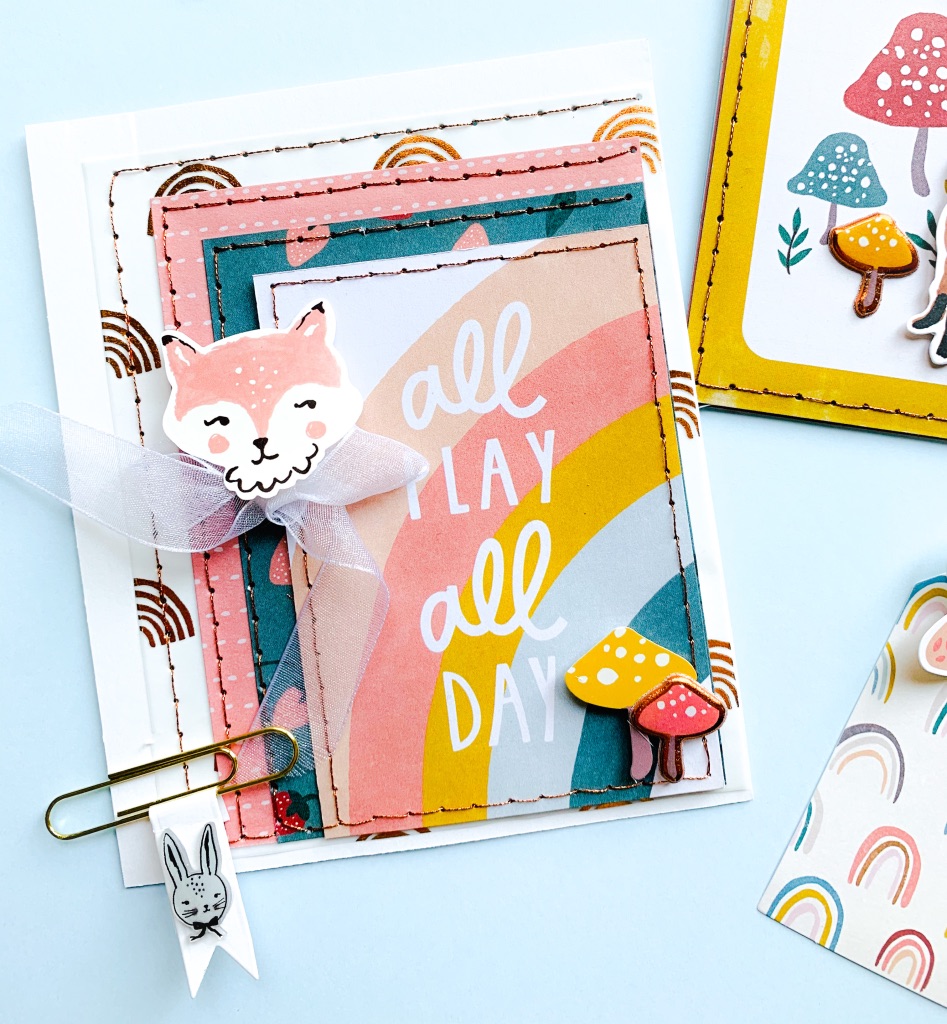
From the white Bazzil, I made two 12cm wide cards x 15cm high and I attached in descending order the various and finally, the badges.
I decorated with some stickers, die-cuts and puffy stickers
These two cards are for children.
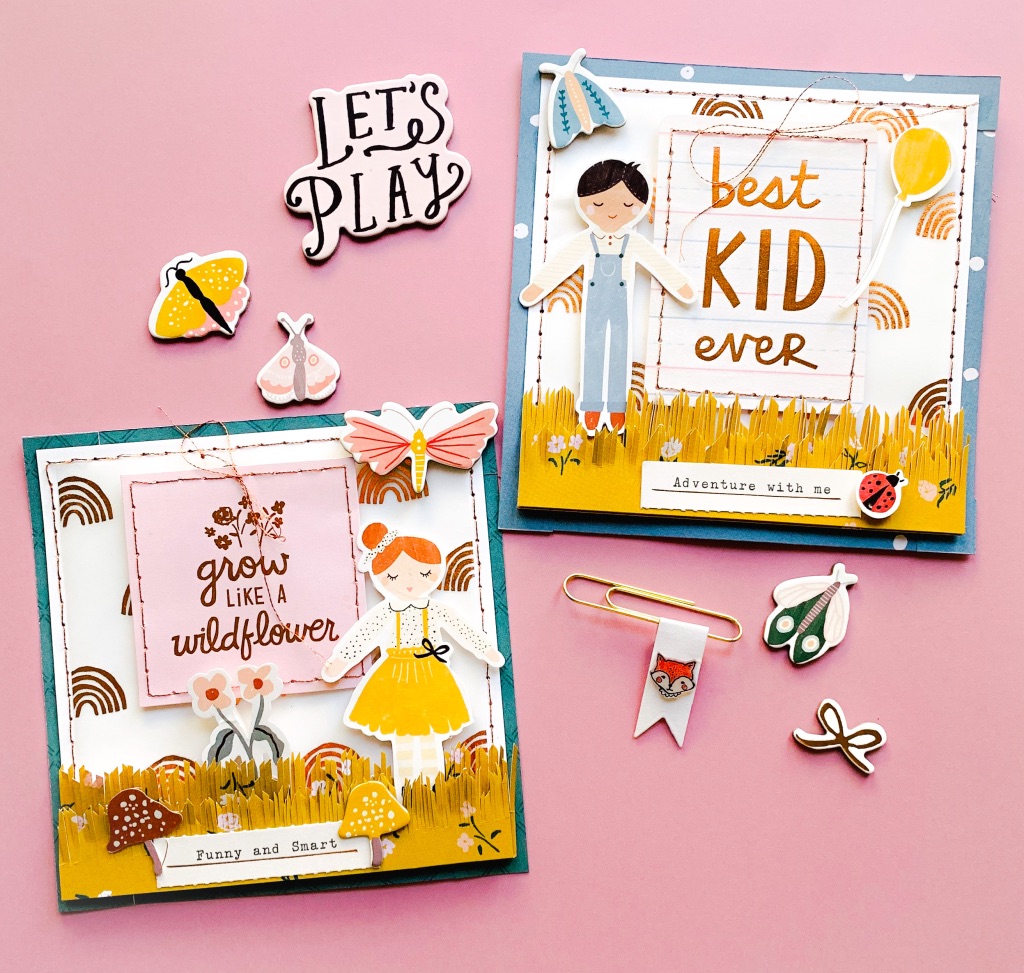
From the Meadow and Critters card, I created the base which measures 12,5cm x 12,5cm.
The white Bazzil, which I sewed on three sides with the Book Binding Punch Guide, measures 11.5cm x 11.5cm.
The Vellum Dreamer Magical is 10,5cm x 10,5cm.
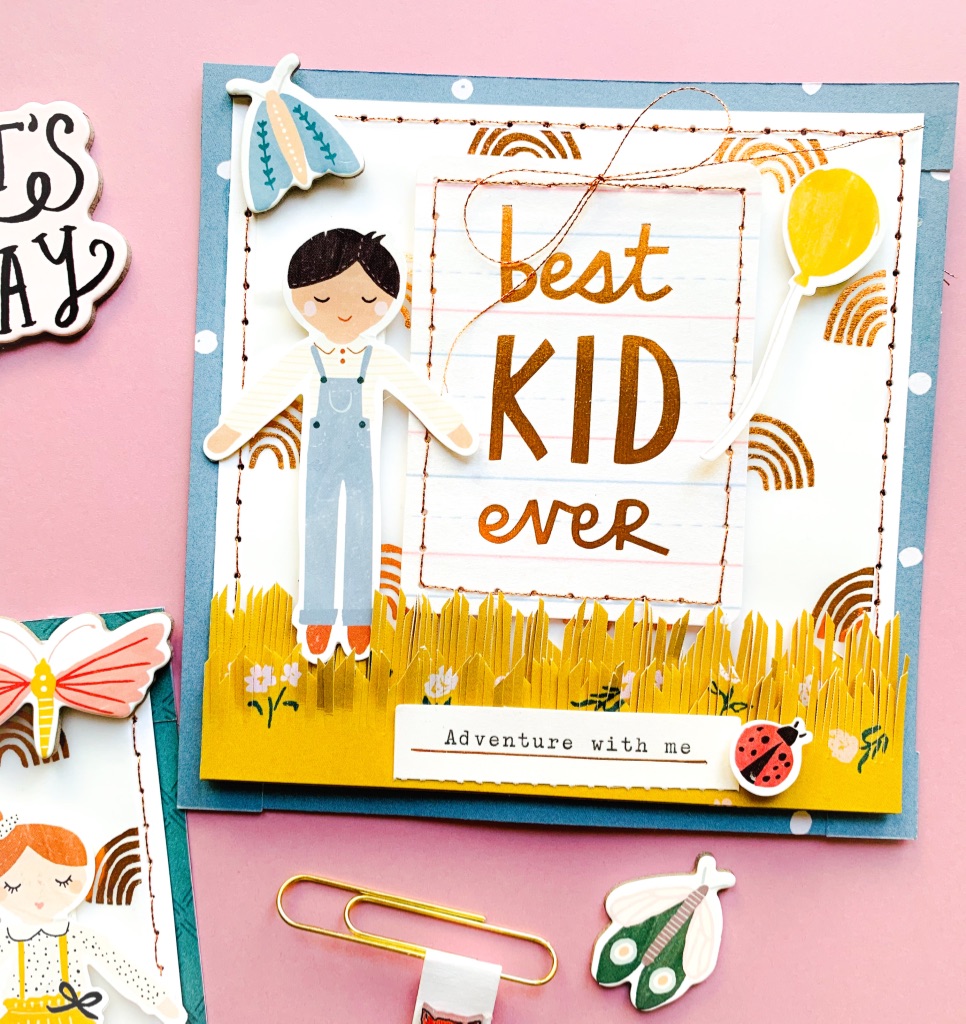
With the Wildflower, I made the grass: they are two layers of different heights that I glued together with thick double-sided adhesive.
I took the two tiles with the words “best kid ever” and “grow like a wildflower” from the pack of die-cuts and I sewed them.
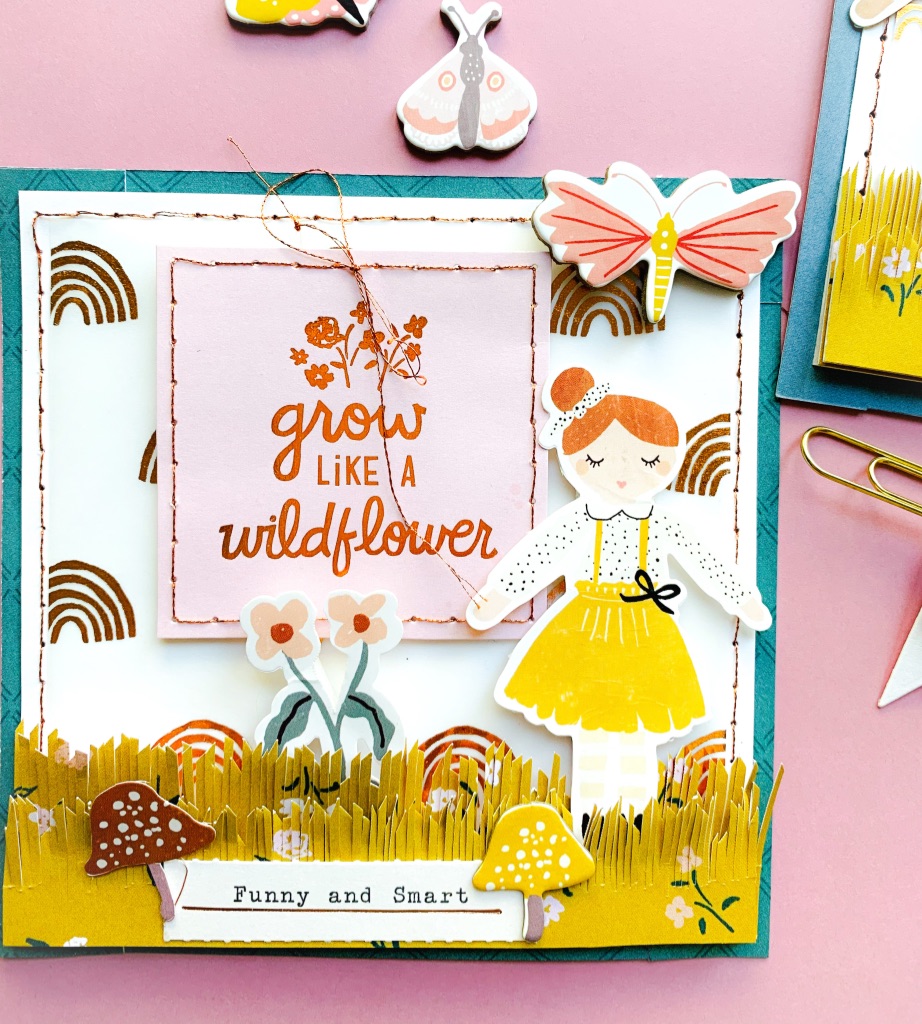
I decorated with some stickers (including the two children); the sentiments do part of the die-cuts.
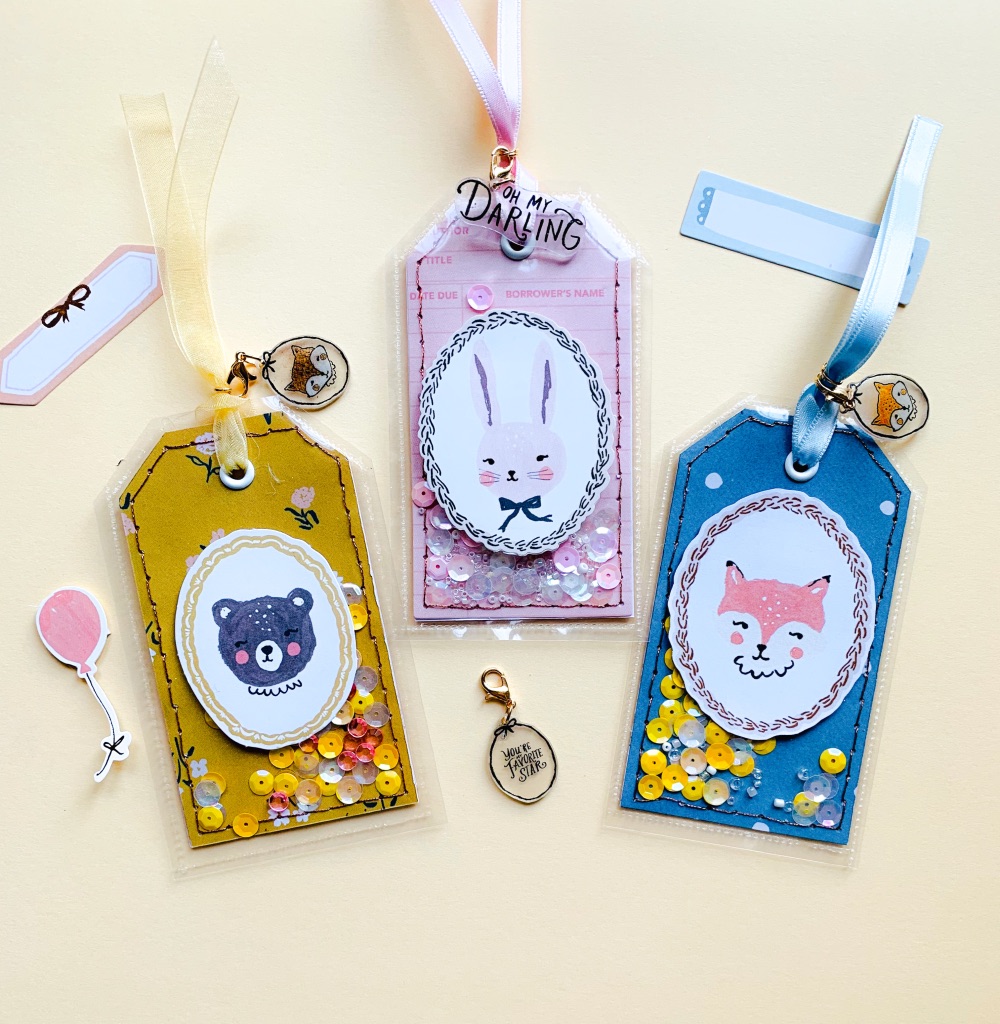
The tags are made with the fuse tool of we R memory.
I cut some patterned cards at 8.5 cm high x 5.5 cm of width; I sewed the edge.
After I took the page protector, I put some colored sequins and I have cauterized with the fuse tool. Finally I decorated with stickers and die-cuts.

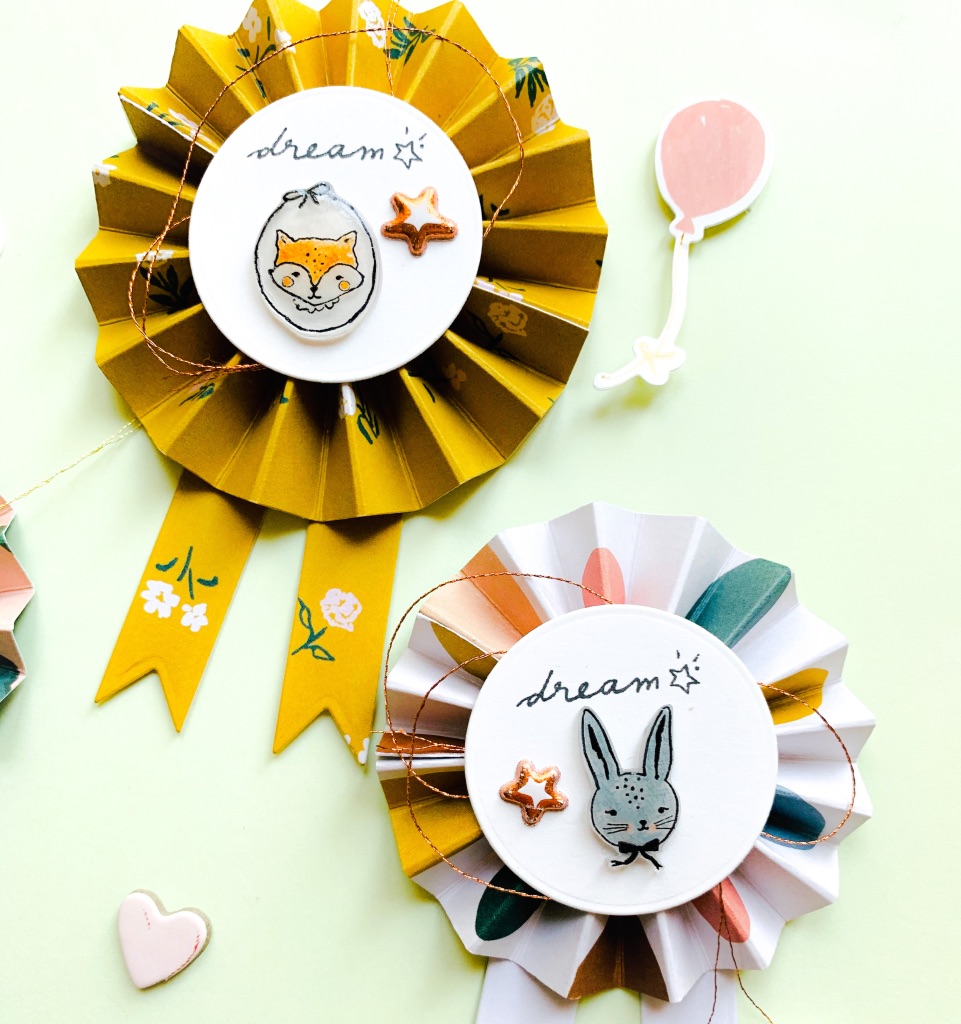
The small pendants, which I used as embellishments, are made with the polishrink.
I stamped, with the staz On, some elements of the clear stamps set from the *Magical Forest* collection, on the polishrink and I colored them with the colored pencils.
I drilled a hole with the crop a dile and cut the image.
Holding the subject still with a round tip, I heated it up with the embosser.
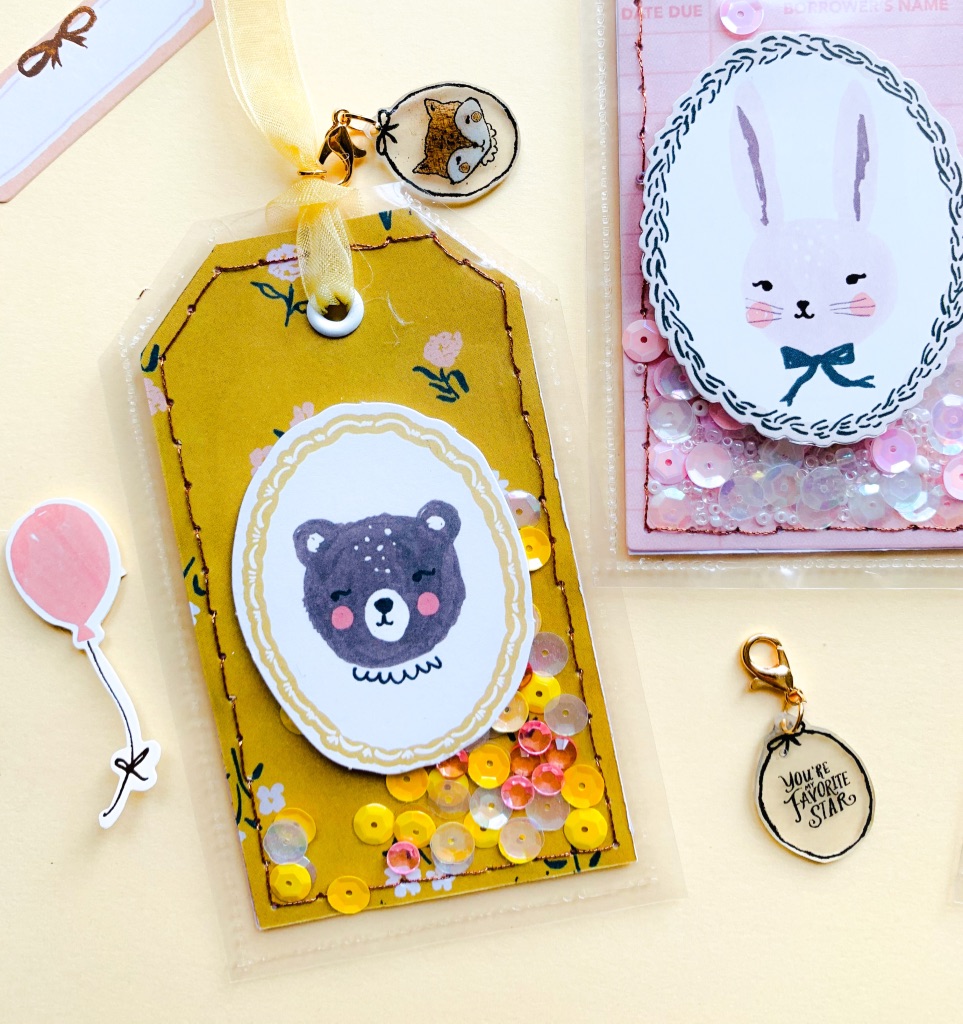
The polishrink, with heat, reduces its size by about 60%…
first he notices himself, then he redistributes himself… at which point the flattened with a plexiglass base.
It can also be made in an oven at 170° ( system definitely more easy compared to embosser )
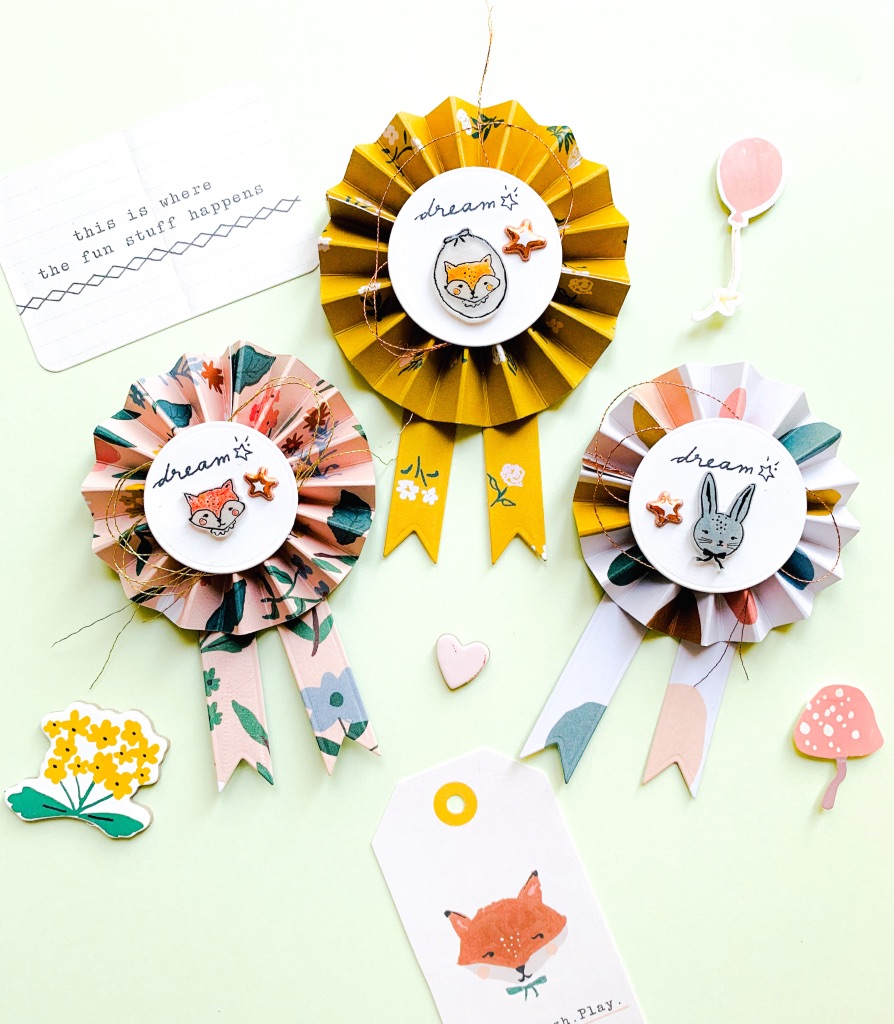
The rosettes are made with the stamps and dies set from the collection *Heritage*.
The patterned paper measures 3cm wide x 34cm long and is creased on the long side at every inch.
I glued, with hot glue, the rosette to the die-cut small circle
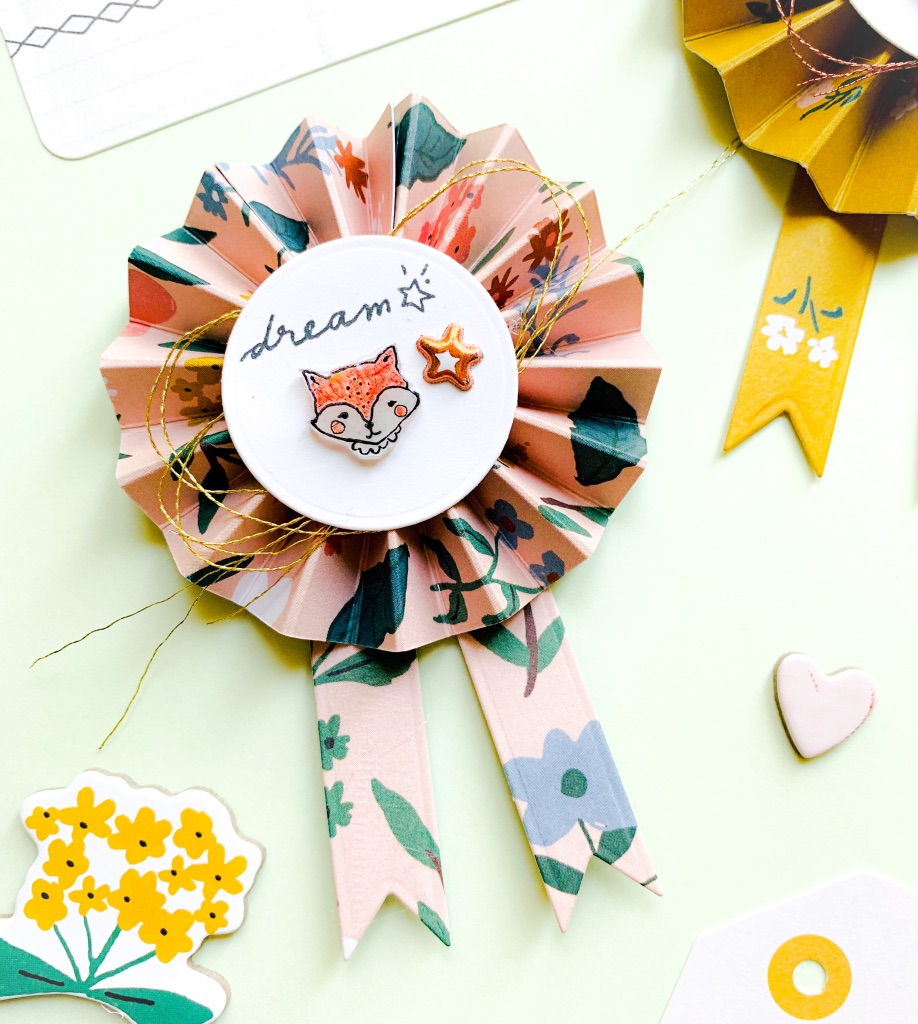
The small images, which are glued on the circle, are made with the set of stamps from the *Magical Forest* collection and the polishrink.
Et voilà …many small gifts and embellishments for our gifts…
I hope you enjoyed the project!
Happy crafting!!!!!
Your site is very helpful. Many thanks for sharing!