
 |
Difficoltà: Bassa |
 |
Tempo: 60 min |
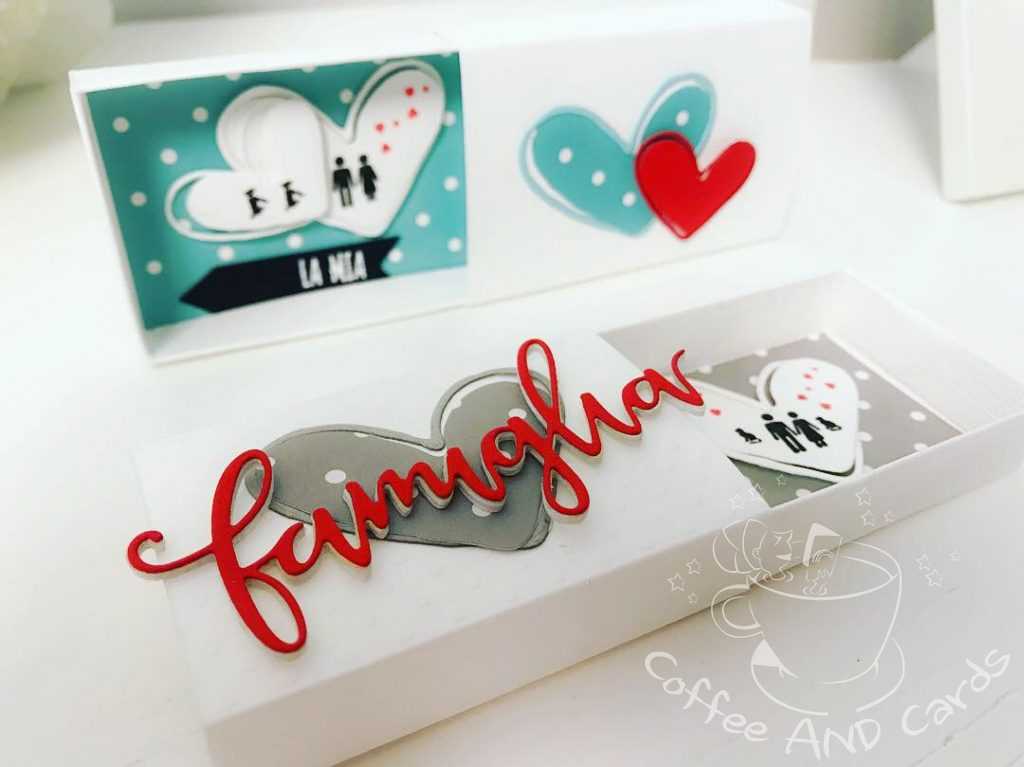
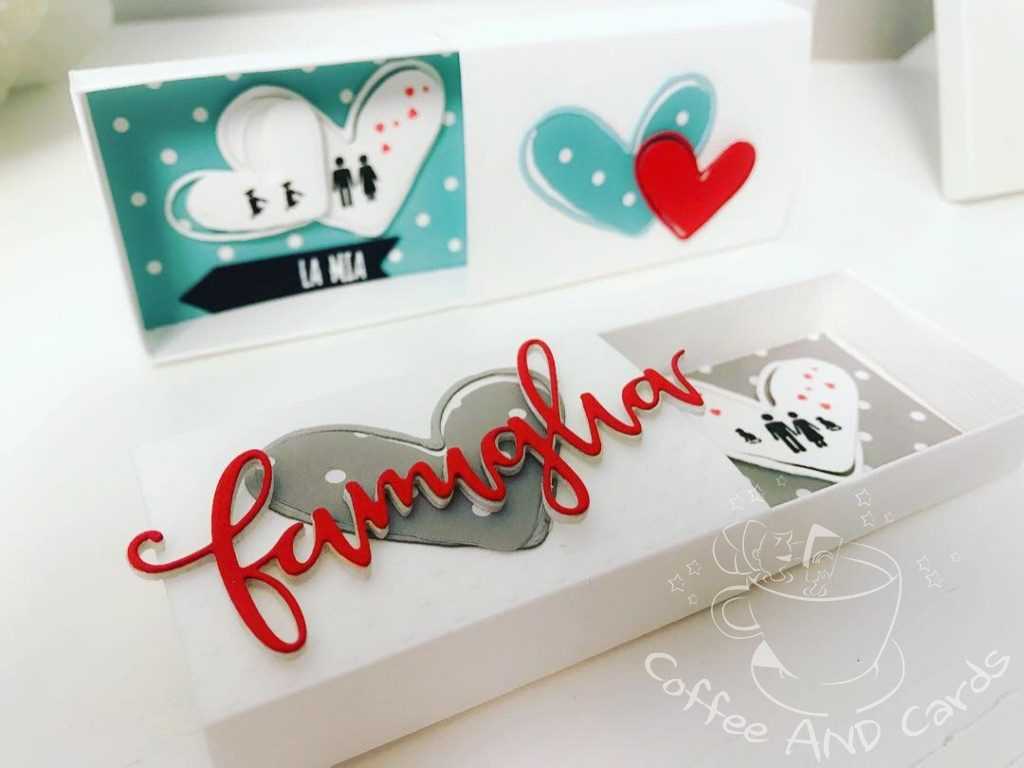
Buonasera cardmakers! Oggi vi mostro un piccolo progetto che ho preparato pensando alla mia famiglia…quest’ anno festeggio 20 anni di unione con mio marito…e l’ anniversario per me significa celebrare la famiglia e tutto ciò che abbiamo costruito insieme…
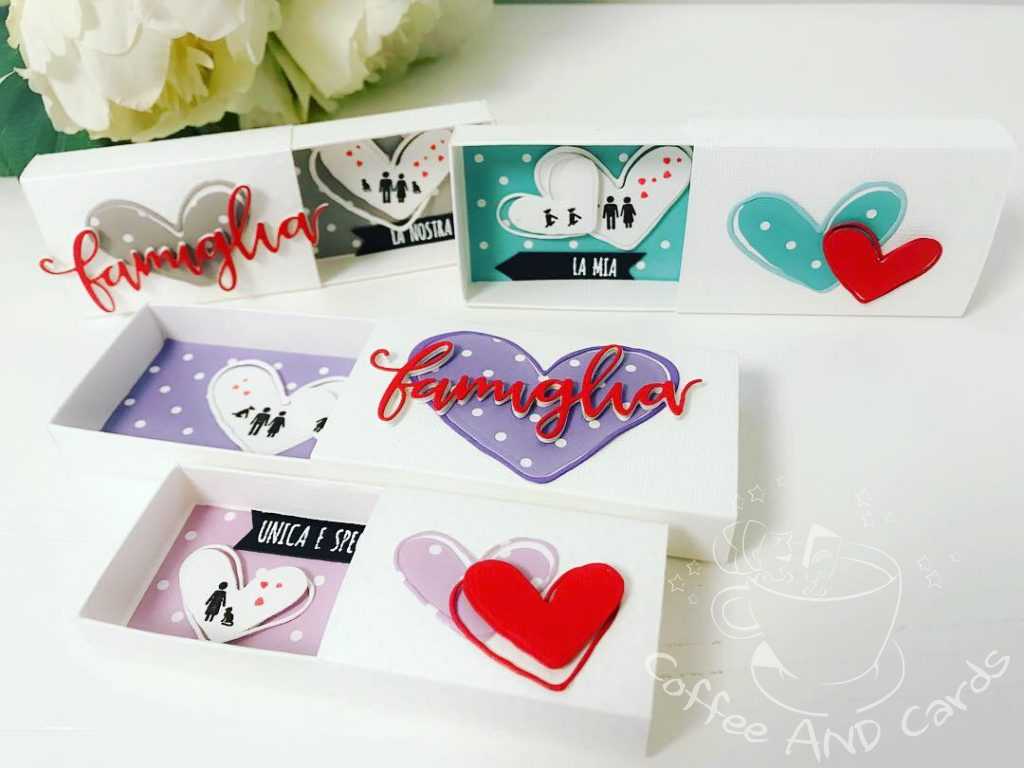
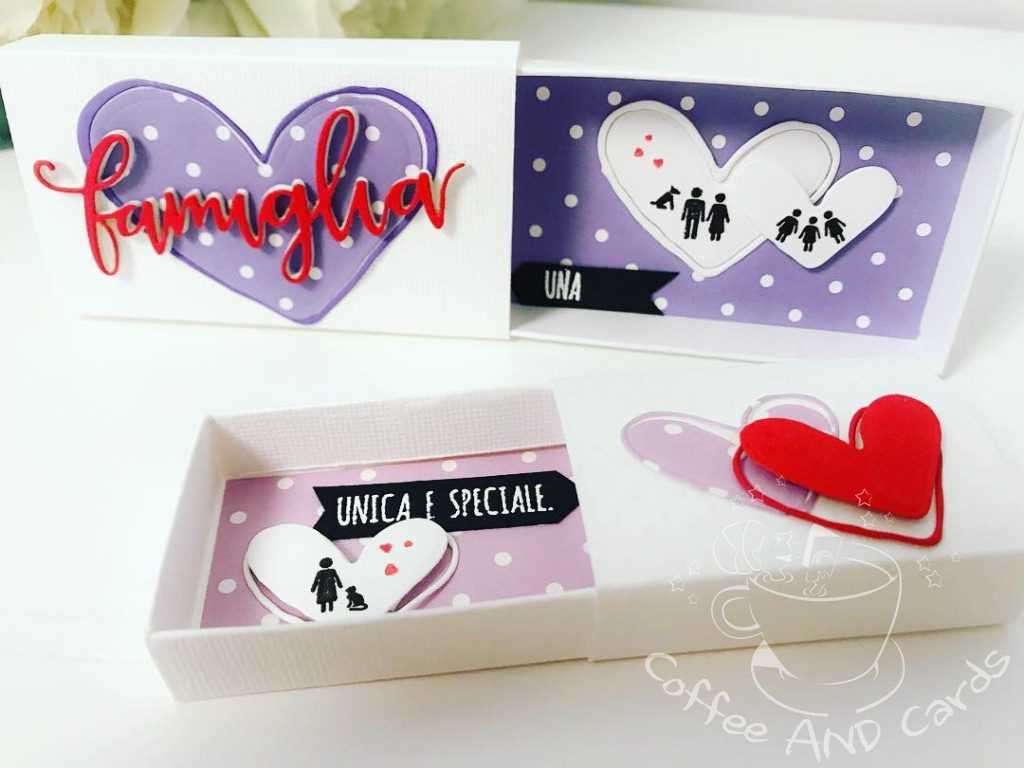
E poi, mentre le davo forma e giocavo con questi adorabili minuscoli timbrini, pensavo che le combinazioni di famiglia possono essere davvero molteplici… e così… mi son fatta prendere un pò la mano…e ne ho fatte quattro diverse..ops…
Materiali utilizzati:
- Fustella e timbri : Famiglia di Modascrap
- Fustella : True Love di Modascrap
- Paper Pack “thinking about Polinesia” di Modascrap
- Bazzil bianco effetto tessuto e liscio
- Nastro biadesivo e colla Nuvo
- Taglierina Impronte d’ Autore
- Versafine nero per timbrare i piccoli membri delle famiglie
- Versamark per i sentiments
- Embossing powder “glacier white” di Nuvo
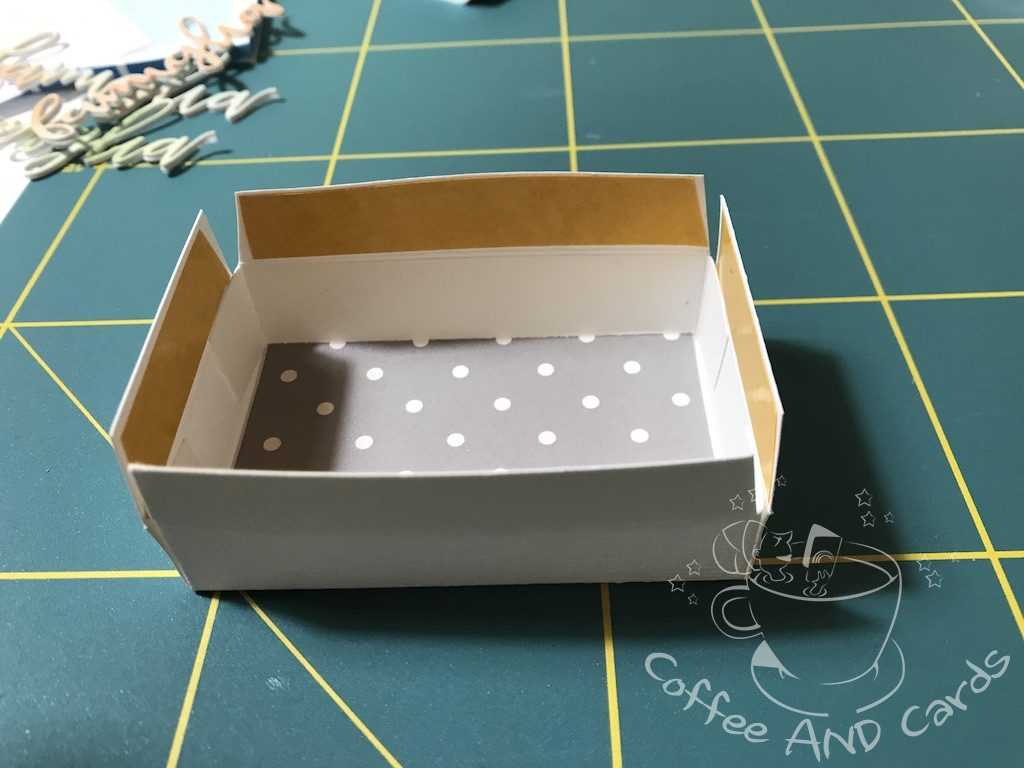
Adesso vediamo come fare le scatoline nei 4 formati diversi:
PRIMA SCATOLINA
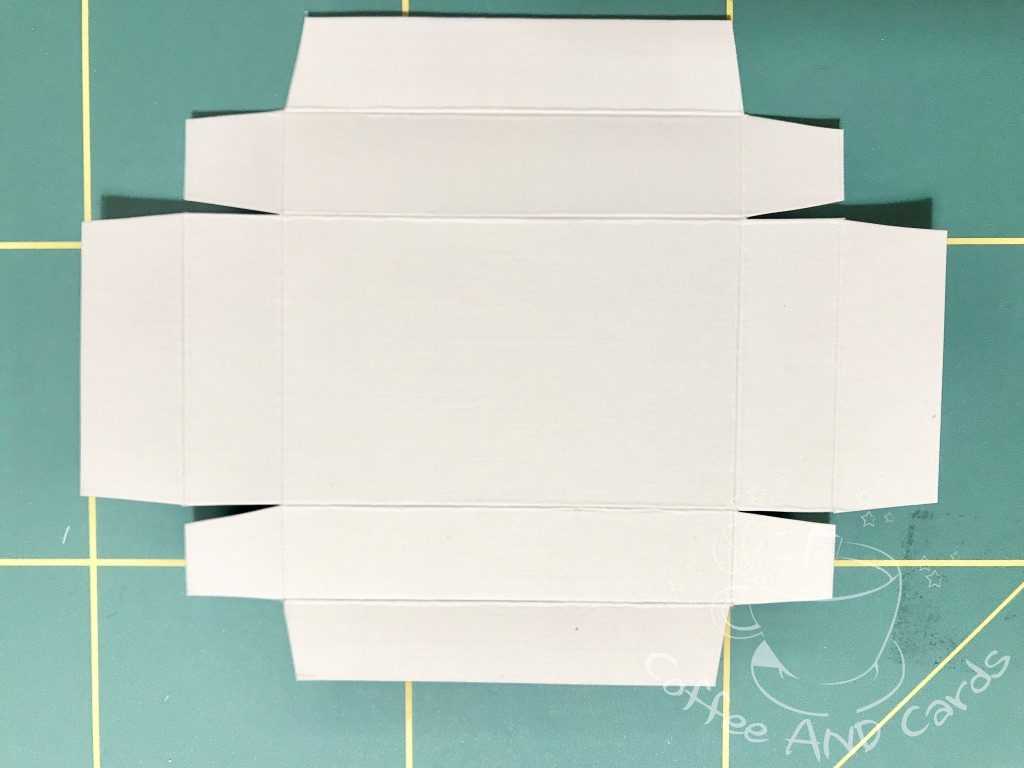
LA BASE misura 9cm x 5cm: per realizzarla ho utilizzato un Bazzil bianco effetto tessuto da 220 gr circa 15cm x 11cm, l’ ho cordonato sul lato lungo a 1,5cm – 3cm – 12 cm – 13,5cm e sul lato corto a 1,5cm – 3cm – 8cm – 9,5cm. Per IL SUO COPERCHIO ho usato un Bazzil 14,5cm x 9,2cm che ho cordonato sul lato lungo a 5,1cm – 6,7cm – 11,8cm – 13,4cm (se-per la base usate un cartoncino più spesso è meglio aumentare tutto di 1 mm per il coperchio altrimenti sarà troppo stretto e la base farà difficoltà ad entrare)
SECONDA SCATOLINA
LA BASE misura 8cm x 5cm: per realizzarla ho utilizzato un Bazzil bianco effetto tessuto da 220 gr circa 14cm x 11cm, l’ ho cordonato sul lato lungo a 1,5cm – 3cm – 11 cm – 12,5cm e sul lato corto a 1,5cm – 3cm – 8cm – 9,5cm. Per IL SUO COPERCHIO ho usato un Bazzil 14,5cm x 8,2cm che ho cordonato sul lato lungo a 5,1cm – 6,7cm – 11,8cm – 13,4cm
TERZA SCATOLINA
LA BASE misura 7cm x 4,5cm: per realizzarla ho utilizzato un Bazzil bianco effetto tessuto da 220 gr circa 13cm x 10,5cm, l’ ho cordonato sul lato lungo a 1,5cm – 3cm – 10 cm – 11,5cm e sul lato corto a 1,5cm – 3cm – 7,5cm – 9cm. Per IL SUO COPERCHIO ho usato un Bazzil 13,5cm x 4,7cm che ho cordonato sul lato lungo a 4,6cm – 6,2cm – 10,8cm – 12,4cm
QUARTA SCATOLINA
LA BASE misura 6cm x 4cm: per realizzarla ho utilizzato un Bazzil bianco effetto tessuto da 220 gr circa 12cm x 10cm, l’ ho cordonato sul lato lungo a 1,5cm – 3cm – 9 cm – 10,5cm e sul lato corto a 1,5cm – 3cm – 7cm – 8,5cm. Per IL SUO COPERCHIO ho usato un Bazzil 12,5cm x 4,2cm che ho cordonato sul lato lungo a 4,1cm – 5,7cm – 9,8cm – 11,4cm
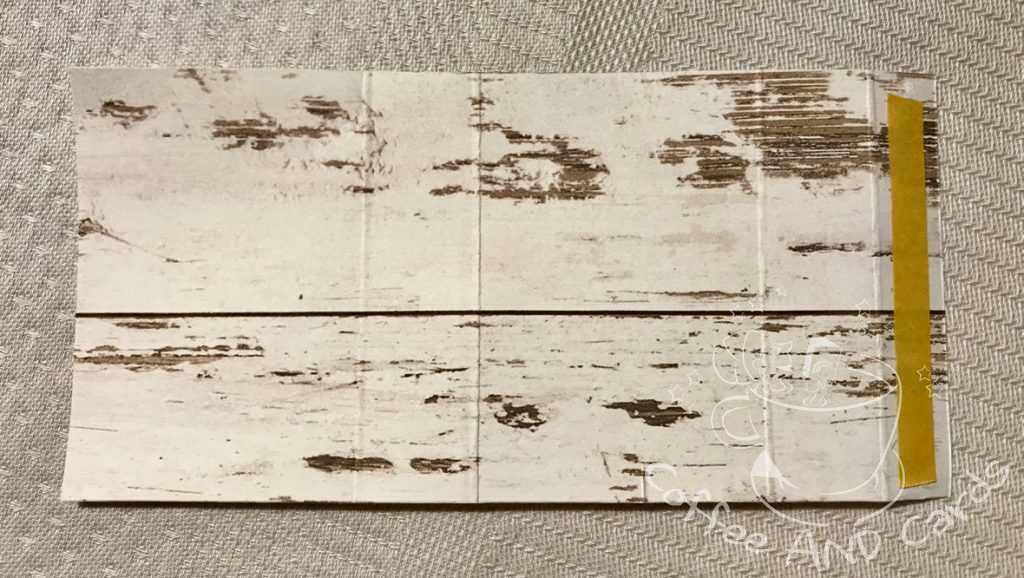
Dopo aver ricavato tutti gli elementi ho effettuato dei tagli su ogni base come da foto
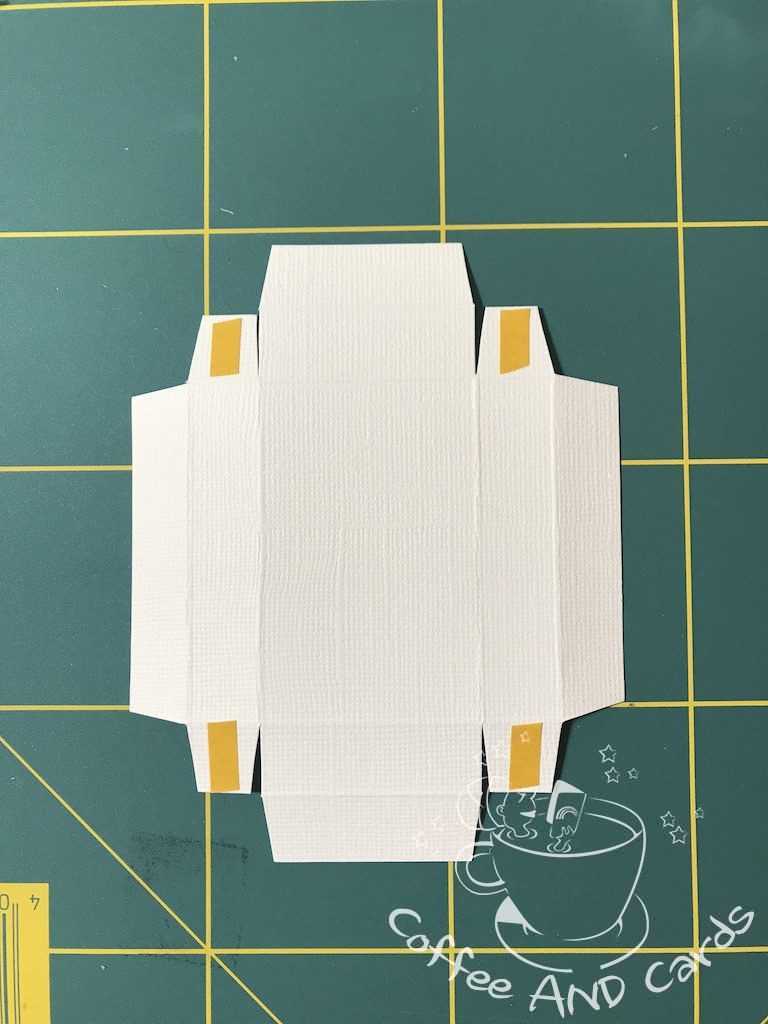
A questo punto ho applicato il nastro biadesivo come da foto
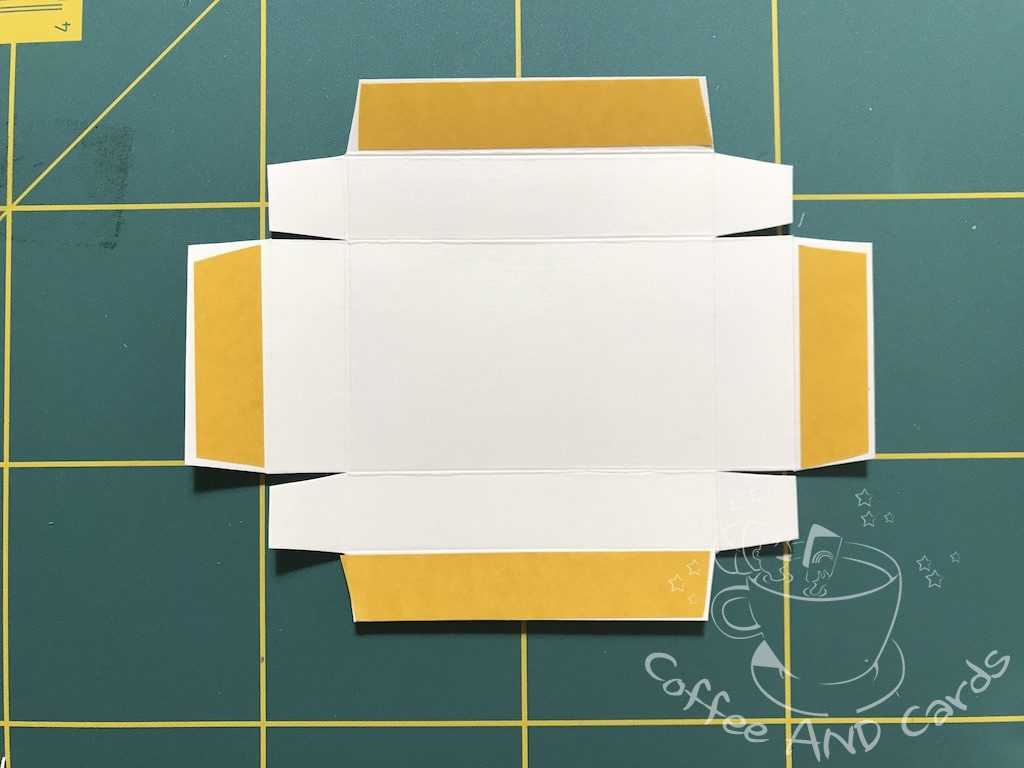
Prima di procedere all’ incollaggio dei lati, ho attaccato la mia carta patterned
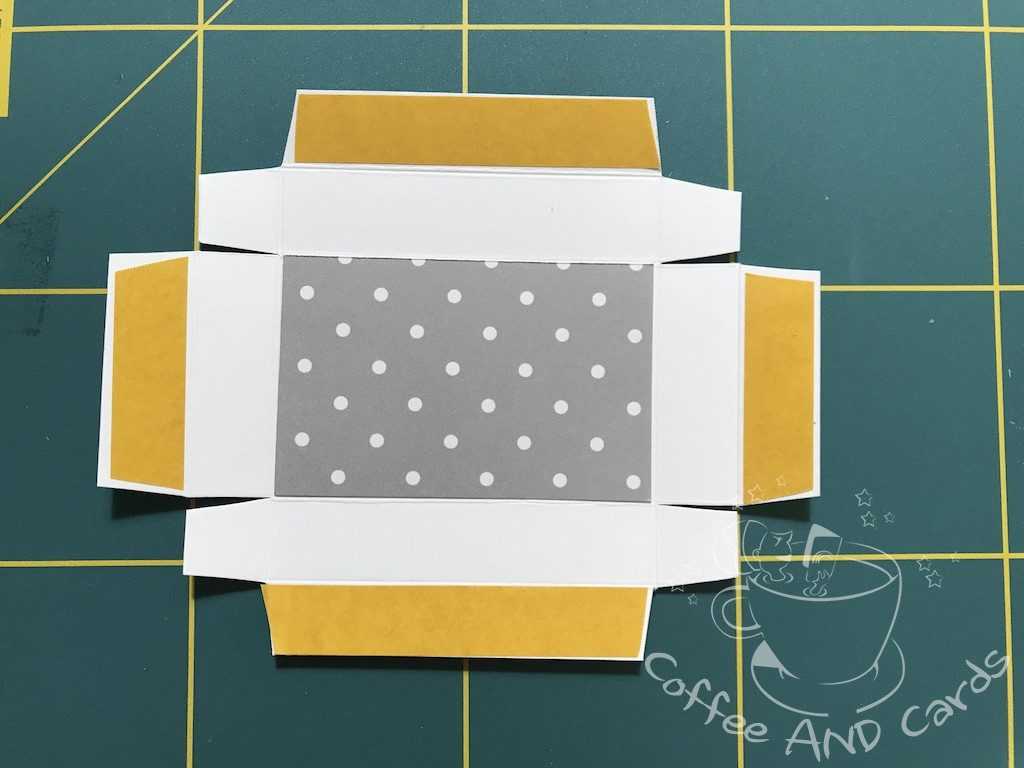
A questo punto ho incollato le varie parti

Ho fustellato più volte la scritta famiglia per spessorarla , i cuori negli stessi colori della base interna e dei cuori bianchi sui quali ho timbrato i piccoli membri delle famiglie….

Per i sentiments ho usato sempre il set famiglia che ho timbrato con il Versamark ed embossato con la polvere White di Nuvo
Et voilà ….. le scatoline-famiglia sono pronte….cosa dite???
Felice crafting a tutti!!!!
Hmm it seems like your site ate my first comment (it was super long) so I guess I’ll just sum it up what I had written and
say, I’m thoroughly enjoying your blog. I too am an aspiring
blog blogger but I’m still new to the whole thing. Do you have any tips and hints for rookie blog writers?
I’d certainly appreciate it.
Hy darling,
I can tell you what I did…
I’m not a professional blogger… I only do scrapbooking in my spare time so I apologize if the information I’ll give you won’t be super accurate.
First of all, when you design something… take notes and take pictures of what seems to be the most important steps.
The photos of the finished project are very important… they have to attract attention and above all they have to be bright.
When you have finished, try to write down the various steps of the project by adding the photos… this way you will get a tutorial.
As for the blog, I relied on a specialized company (I saved 1 year before I could afford this expense, but I wanted a blog of my own that would represent me as much as possible).
There is the possibility to open free blogs and there are also many tutorials on YouTube that explain how to do…
I hope I’ve been useful to you…
Happy crafting!
Marika
Appreciate the recommendation. Will try it out.
Thank you so much…
Happy crafting
Marika
Hi, its pleasant article about media print, we all understand media is a
fantastic source of information.
Thank you so much!!!!
Marika
I feel this is one of the so much important info for me.
And i am glad studying your article. But should statement on few
general things, The website style is great, the articles is really great :
D. Just right task, cheers
thank you so much!!!
Greate article. Keep writing such kind of information on your page.
Im really impressed by your blog.
Hey there, You have done an incredible job.
I’ll definitely digg it and individually recommend to my
friends. I am sure they’ll be benefited from this website.
ohhhh! thank you so much!!!!!!!
it’s always nice to receive these comments … thank you very much
Excellent way of explaining, and pleasant post to obtain information on the topic of my presentation subject matter,
which i am going to present in university.